Paint Viscosity Measurement before Spraying
Contents
What is Paint Viscosity?
In short, the viscosity of a coating material is an indication of its ability to resist flow. And the flow characteristics of fluids are directly related to the degree of internal friction. As a result, anything that affects internal friction (e.g., solvents, thinners, or temperature changes) will affect flow. In addition, the flow characteristics determine how well the paint flows out of the spray gun, how well the material is atomized and what nozzle size is required. Viscosity control is therefore essential to achieve a uniform finish. Generally, material suppliers will recommend the best viscosity to apply the selected material for a particular job.
Different Methods of Paint Viscosity Measurement
There are different methods for determining the viscosity of a material, and each method may have one or more units of measurement:
Krebs (KU’s)
The measurement of the resistance to the movement of a device (such as a paddle or fork) through the material in a rotational motion is expressed in Krebs Units (KU’s).
Poise or Centipoise
The resistance of a material to a falling object passing through it, usually a ball of a given size and weight, is expressed in poise or centipoise (100 poise).
Gardner-Holt Bubble Method
The time taken for an air bubble to rise through a quantity of material in a tube is the Gardner-Holt Bubble Method.
Efflux Method
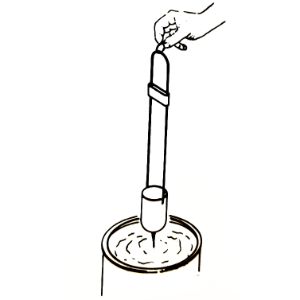
The time taken it takes for a given quantity of material to flow through a given size of orifice in the bottom of a special cup is the efflux method. The efflux method is one of the most commonly used. Both Zahn and Ford cups are available with different sized orifices to provide a wide range of viscosity measurements. However, the two most commonly used for paints are the Zahn #2 and the Ford #4.
How to Measure Paint Viscosity for Spraying
Equipment
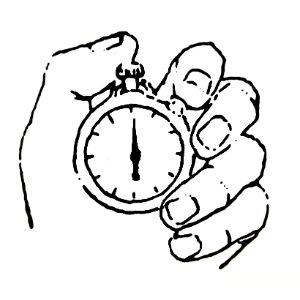
Viscosity cup, stopwatch, accessories (see above)
Procedure Zahn #2 Cup
1. Prepare (mix, strain, etc.) the material to be tested
2. Submerge the cup in the material
3. Raise the cup from the material and start the stopwatch, keep your eyes on the flow…
4. When the solid stream “breaks” (indicating air passing through orifice), stop the watch
5. The result is expressed in seconds (e.g. 22 seconds #2 Zahn)
Procedure Ford #4 Cup
1. Prepare (mix, strain, etc.) the material to be tested
2. Pour material into the cup. Restrain flow with finger
3. Remove finger
4. When the solid stream “breaks” (indicating air passing through orifice), stop the watch
5. The result is expressed in seconds (e.g. 28 seconds #4 Ford)